In the last post related to home automation and IoT solution we talked about a simple watering system - http://vunvulearadu.blogspot.com/2018/05/iot-home-automation-basic-plant.html
In this post, we talk about how you can integrate the alarm security system and what is the approach that I used in the end. From the hardware perspective, I have an alarm system based on Paradox Magellan MG5050 with a K35 Keyboard and REM15 remote controls. On top of this, I have an additional module for messages - PCS 250
Mission
To connect the alarm system to ESP8266 in such a way that I could arm and disarm the house using the ESP8266.
First approach – Zone 8
To be able to control from an external device the Paradox board, you could, in theory, define a zone that can be used to arm or disarm the system. It can be confirmed using zone 8 (Z8) in combination with temper feature. Because I’m not a power user of Paradox systems, I was not able to configure it, just triggering the alarm system for too many times.
The second approach - SMS
Another approach that I tried was to send commands over SMS. Yes, Magellan MG5050 allows us to send commands to the alarm system. I have a PCS 250 module connected to receive any state change of the system, and it can also be used to send commands to the unit. The feature works great, and you have the agility to do many things behind the scene.
The limitation of text messages is that they are working only 7 minutes after a power-up or a SIM card switch. Meaning that there is no way how you can control the system over SMS later on. From a security perspective, it is a right decision, but this would mean that each time when I want to arm or disarm would require me to disconnect the power from the unit. From an automation perspective, it is possible, but I don’t feasible.
The third approach – Remote Control Circuits
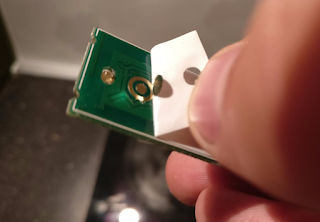
I decide to open a remote control to see if there is I can connect directly to it. As you can see from the below picture, it would require a steady hand. Beside this, I was not able to find any technical diagrams related to remote circuits and where I should connect the wires.

The fourth approach – Remote Control Buttons
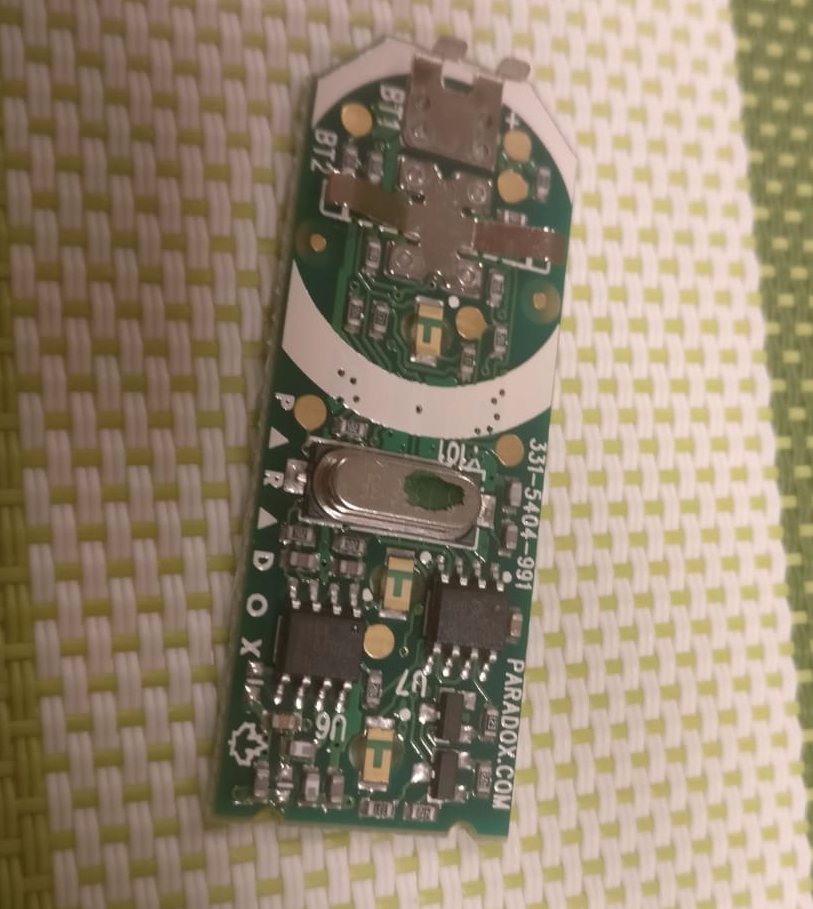
From the beginning, I assumed that remote control buttons are constructed using a grafit film (carbon) as for classical remoted, mainly because there was a plastic film on top of the buttons core.
The assumptions were wrong because the contacts are based on metal, not on carbon. It means that I can weld directly wired on them to send the arming and disarming commands.
Final solution
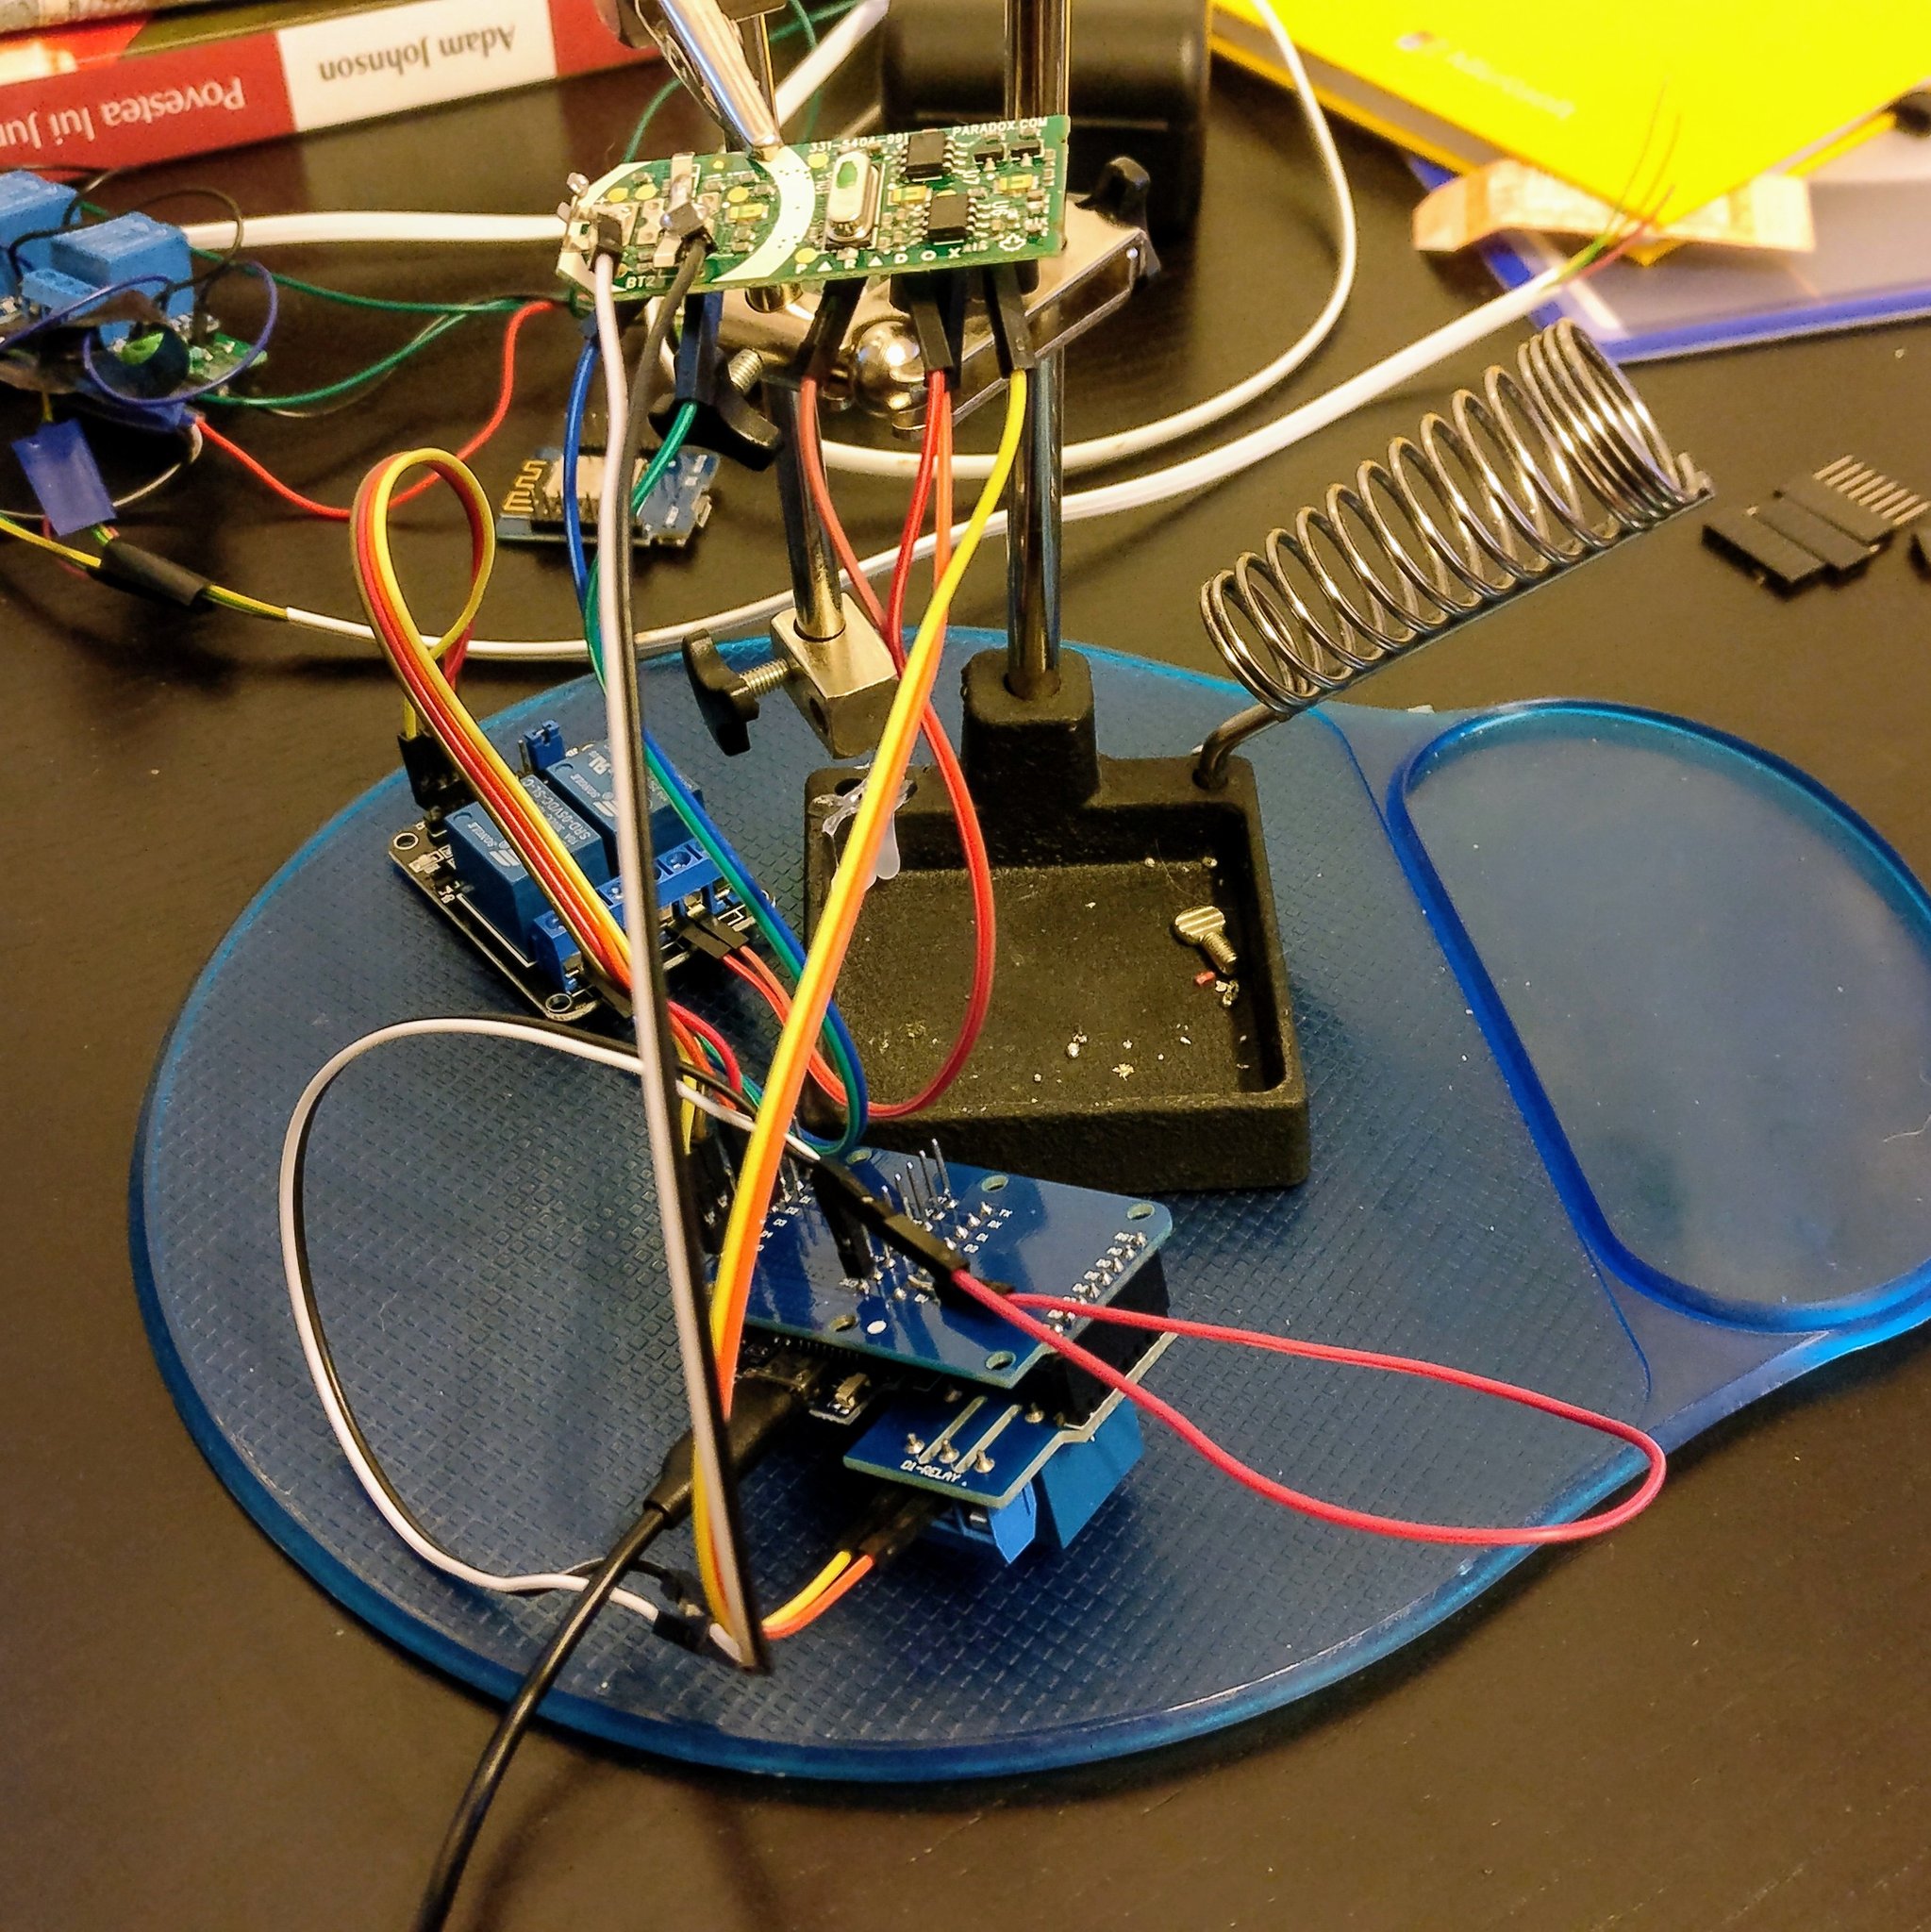
On each button from the remote I weld wires that that is connected to ESP8266 relays. From ESP8266 I can close I close a button circuit for 1 second using the relay. In this way, I emulate the physical push of a button.
Behind the scene, the ESP8266 fetch data from Microsoft Azure using a REST API hosted inside App Services as you can see below.

Because ESP8266 works at 3.3V, at the same voltage as the Remote Control, I was able to remove the battery of the remote and supply energy directly from the ESP8266 board.
Lesson learned
Some things created issues and deserve to be mention.
(1) Not clear for me initially if the double relay board works at 5V or 3.3V
(2) The double relay board confused me initially. The open and closed circuit it opposite as the simple relay is configured. Because of this initially, I would send all the time commands to the remote control.
Code
The ESP8266 code can be found below.
In this post, we talk about how you can integrate the alarm security system and what is the approach that I used in the end. From the hardware perspective, I have an alarm system based on Paradox Magellan MG5050 with a K35 Keyboard and REM15 remote controls. On top of this, I have an additional module for messages - PCS 250
Mission
To connect the alarm system to ESP8266 in such a way that I could arm and disarm the house using the ESP8266.
First approach – Zone 8
To be able to control from an external device the Paradox board, you could, in theory, define a zone that can be used to arm or disarm the system. It can be confirmed using zone 8 (Z8) in combination with temper feature. Because I’m not a power user of Paradox systems, I was not able to configure it, just triggering the alarm system for too many times.
The second approach - SMS
Another approach that I tried was to send commands over SMS. Yes, Magellan MG5050 allows us to send commands to the alarm system. I have a PCS 250 module connected to receive any state change of the system, and it can also be used to send commands to the unit. The feature works great, and you have the agility to do many things behind the scene.
The limitation of text messages is that they are working only 7 minutes after a power-up or a SIM card switch. Meaning that there is no way how you can control the system over SMS later on. From a security perspective, it is a right decision, but this would mean that each time when I want to arm or disarm would require me to disconnect the power from the unit. From an automation perspective, it is possible, but I don’t feasible.
The third approach – Remote Control Circuits
I decide to open a remote control to see if there is I can connect directly to it. As you can see from the below picture, it would require a steady hand. Beside this, I was not able to find any technical diagrams related to remote circuits and where I should connect the wires.
The fourth approach – Remote Control Buttons
From the beginning, I assumed that remote control buttons are constructed using a grafit film (carbon) as for classical remoted, mainly because there was a plastic film on top of the buttons core.

The assumptions were wrong because the contacts are based on metal, not on carbon. It means that I can weld directly wired on them to send the arming and disarming commands.
Final solution
On each button from the remote I weld wires that that is connected to ESP8266 relays. From ESP8266 I can close I close a button circuit for 1 second using the relay. In this way, I emulate the physical push of a button.
Behind the scene, the ESP8266 fetch data from Microsoft Azure using a REST API hosted inside App Services as you can see below.

Because ESP8266 works at 3.3V, at the same voltage as the Remote Control, I was able to remove the battery of the remote and supply energy directly from the ESP8266 board.
Lesson learned
Some things created issues and deserve to be mention.
(1) Not clear for me initially if the double relay board works at 5V or 3.3V
(2) The double relay board confused me initially. The open and closed circuit it opposite as the simple relay is configured. Because of this initially, I would send all the time commands to the remote control.
Code
The ESP8266 code can be found below.
#
include < Arduino.h > #include < ESP8266WiFi.h > #include < ESP8266HTTPClient.h >
#ifdef ESP8266
extern "C" {#
include "user_interface.h"
}#
endif
# define SSID "lola"#
define PASSWORD "lola"#
define URLROOT "http://lola.azurewebsites.net"
void setup() {
pinMode(D1, OUTPUT);
pinMode(D2, OUTPUT);
pinMode(D3, OUTPUT);
//this is required to read ADC values reliably
wifi_set_sleep_type(NONE_SLEEP_T);
Serial.begin(57600);
// delay is required only for debugging
delay(2000);
Serial.println("Setup complete");
WiFi.mode(WIFI_STA);
}
void loop() {
int retries = 0;
if (WiFi.status() != WL_CONNECTED) {
WiFi.hostname("AlarmSystem");
Serial.println("Not connected to the WiFi.");
WiFi.begin(SSID, PASSWORD);
Serial.println("after wifi begin");
while (retries < 30) {
Serial.println("loop");
if (WiFi.status() == WL_CONNECTED) {
break;
}
delay(1000);
retries++;
}
Serial.println("Exiting loop() for another wifi try.");
return;
} else {
Serial.println("Connected to WIFI!");
}
Serial.println(WiFi.localIP());
// Remarks: Security part removed from the code
HTTPClient http;
String url = URLROOT "/api/alarm?Id=500&lola";
Serial.println(url);
http.begin(url);
http.setTimeout(3000);
int httpCode = http.GET();
Serial.println("HTTP Code for Alarm:");
Serial.println(httpCode);
if (httpCode > 200 && httpCode < 204) {
triggerRelay(httpCode);
}
delay(2000);
}
void triggerRelay(int relay) {
Serial.println("Open Relay");
digitalWrite(D(relay), HIGH);
delay(1000);
Serial.println("Close Relay");
digitalWrite(D(relay), LOW);
}
uint8_t D(uint8_t index) {
switch (index) {
case 201:
return D1;
case 202:
return D2;
case 203:
return D3;
};
}
Comments
Post a Comment